

Note! If you would prefer to watch this guide as a video, here’s one that will have you stitching in less than 15 minutes. How To Needlepoint >
Getting Comfortable with Your Canvas
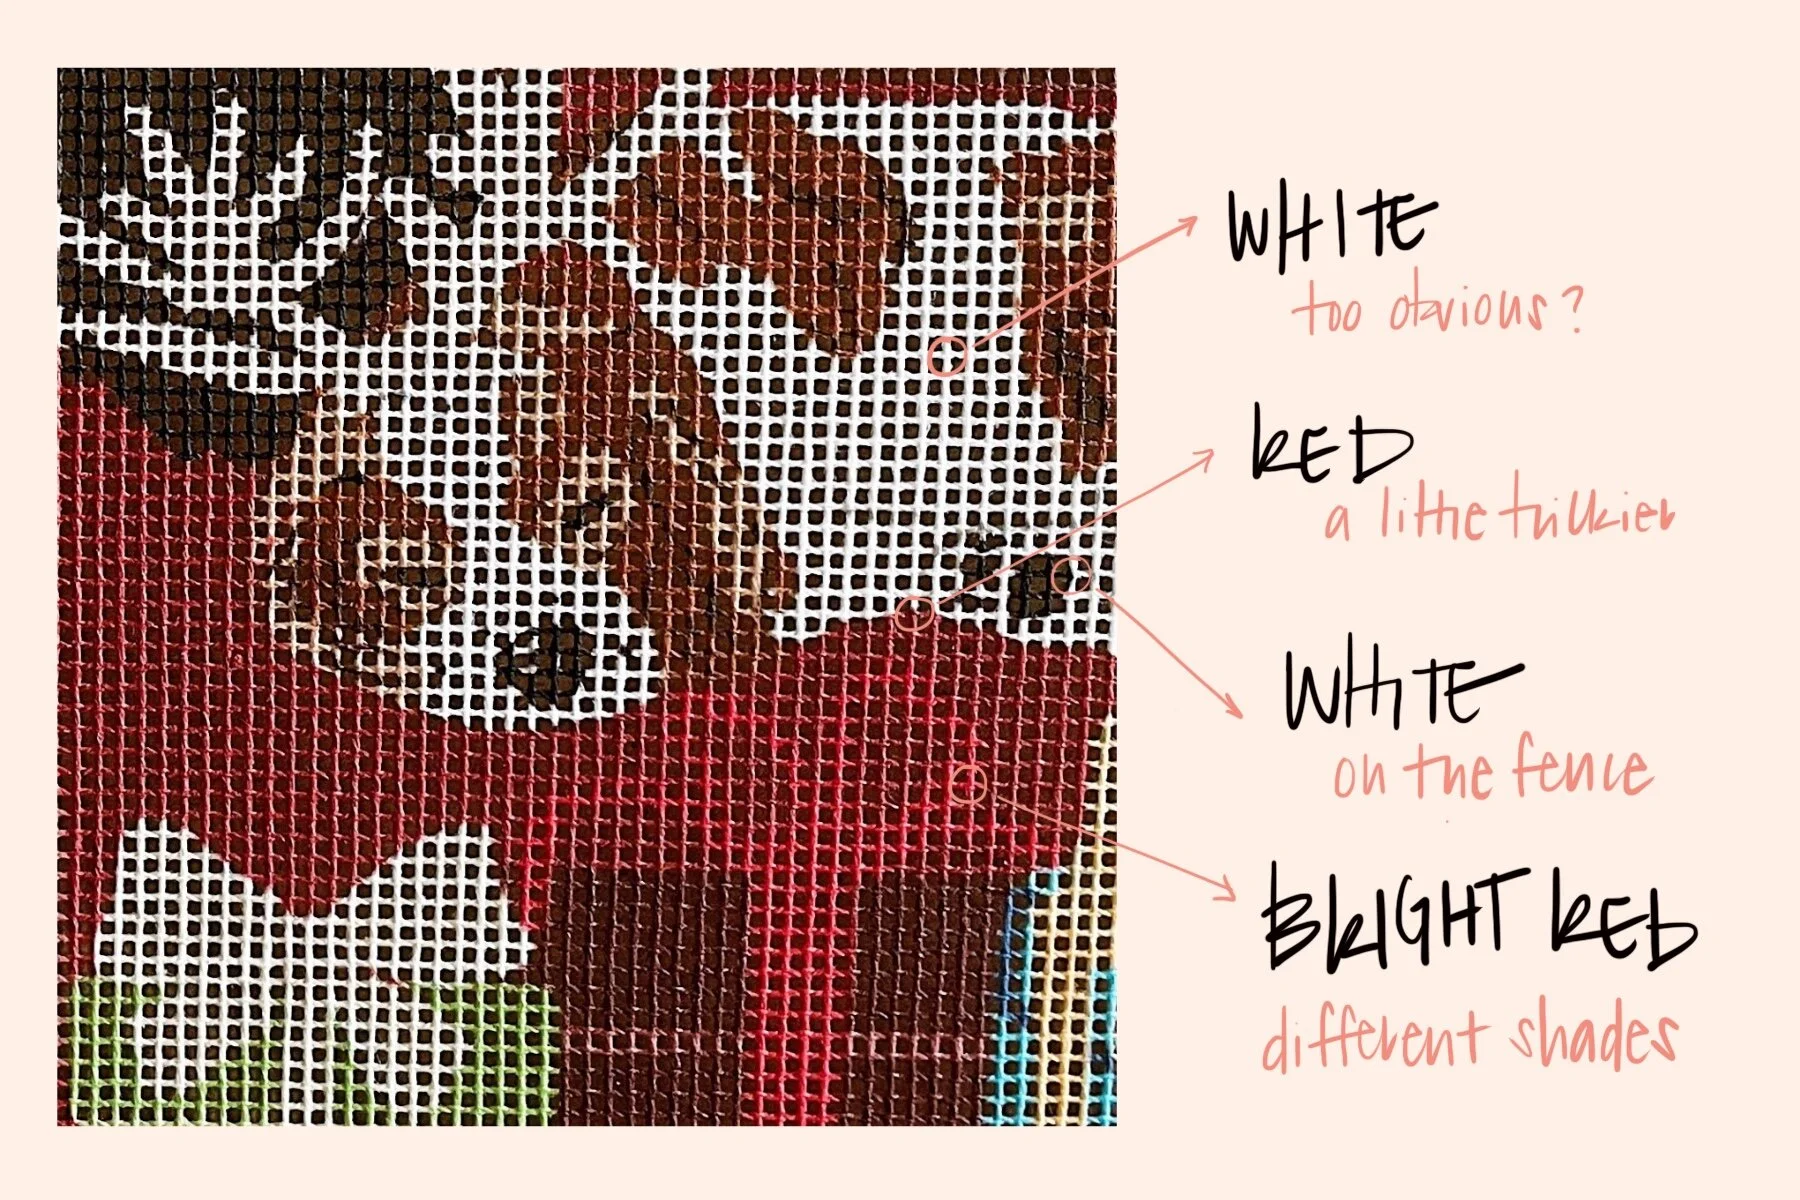
Our needlepoint canvases are designed to be as simple as paint by numbers — stitch by numbers! Each intersection is marked with the color of the stitch that will cross it.
Now it’s time to come up with a plan on where you want to start. Most needlepointers will tell you to start with the details and fill in the background sections later. But if it’s your first time stitching, I recommend practicing your stitches on a larger chunk. This will give you enough space to learn how to stop/end a thread and get into a stitching rhythm. Once you feel confident, move on to the details!
Using the Right Number of Threads
You can use almost any type of thread or yarn to stitch a needlepoint canvas. The key is using the right number of strands to get the right amount of coverage.
For our canvases, I recommend using two strands of Appleton 2-ply crewel wool. You can do this easily by threading the needle, folding the thread in half, and knotting the ends.
If you want to play with different threads, here’s a post all about needlepoint thread >
Starting & Ending Threads
Starting A Thread
Assuming you’re using two strands, thread a 30-inch length through the needle and knot the ends together. No need to get out your measuring tape — when knotted, it should be about the length from your hand to your elbow.


Poke the needle through the front of the canvas about five holes away from where you’ll start stitching. There’s an ugly “waste knot” on the front, but you’ll cut it off shortly.
Bring the needle from the back of the canvas to the front at your starting point. There should be a half-inch thread tail connecting the knot to the first stitch on the back.
Stitch toward the knot, encasing the thread tail. Once you reach the waste knot, just snip it off from the front.
Ending A Thread
When you have three inches of thread left on the needle, take your needle to the back of the canvas.

Insert the needle through five or so existing stitches, then pull taut. (You may have noticed that this is the reverse of the how you started the thread :)
Snip the thread just outside the stitches you pulled through.
Get Stitching
The classic needlepoint stitch is a diagonal “tent” stitch crossing each intersection on your canvas. The stitch always slants upward from the lower left to the upper right — like this: /////
There are many types of needlepoint stitched, but I mostly use tent stitches for that classic needlepoint look. All these stitches look the same from the front, but have different levels of coverage on the back.
- Half-Cross: Stitch used for tiny detail areas. I mean, really tiny, like one stitch for a highlight or an eye. This stitch has very little coverage. If it looks thin, I will often stitch back over the stitch again.
- Continental: I like to use this stitch for any small areas. This stitch has medium coverage. Using it a lot on bigger areas can cause the canvas to skew a little bit, which makes it a little harder to block.
- Basketweave: Stitch used for medium to large areas, especially backgrounds. Basketweave is used on almost all areas with white. It provides more coverage and is more durable.
Continental Stitch


When moving from right to left, stitch up from the lower left to the upper right (middle photo). When moving from left to right, stitch down from the upper right to the lower left (last photo).
If you’re comfortable with the Continental Stitch, learn the other tent stitches (especially Basketweave). You don’t have to stick to just one type of stitch for each project. Most of my canvases are a mixture of all three types.
Find step-by-step, video tutorials on all three tent stitches here >
Have Fun!
Yay! You’re ready to get started on your needlepoint project. This was a lot of info, but the most important thing is to remember to enjoy stitching! Exactly zero of my projects turn out absolutely perfect, but I love them all the same.
If you want to dive a little deeper, here are a few more resources:
-
How To Needlepoint [VIDEO]: If you would prefer to watch this guide as a video, here’s one that will have you stitching in less than 15 minutes!
-
Needlepoint Tool Box: You really only need canvas, thread, needles, and scissors; but these are my latest equipment favorites.
-
Needlepoint FAQs: I keep this updated with questions from Spider Spun customers or things that pop up while I stitch.
-
Finishing 101: As you near the end your project, it’s time to think about “finishing” it. Learn all about your professional or DIY options.

