When to Use the Basketweave Stitch
Stitch used for medium to large areas, especially backgrounds. Basketweave is used on almost all areas with white. It provides more coverage and is more durable.
- Pros: This stitch has the best coverage and the least amount of distortion.
- Cons: It can be a little trickier to learn and it uses the most thread. It is the most durable stitch.
What Basketweave Should Look Like
 How to Work the Basketweave Stitch
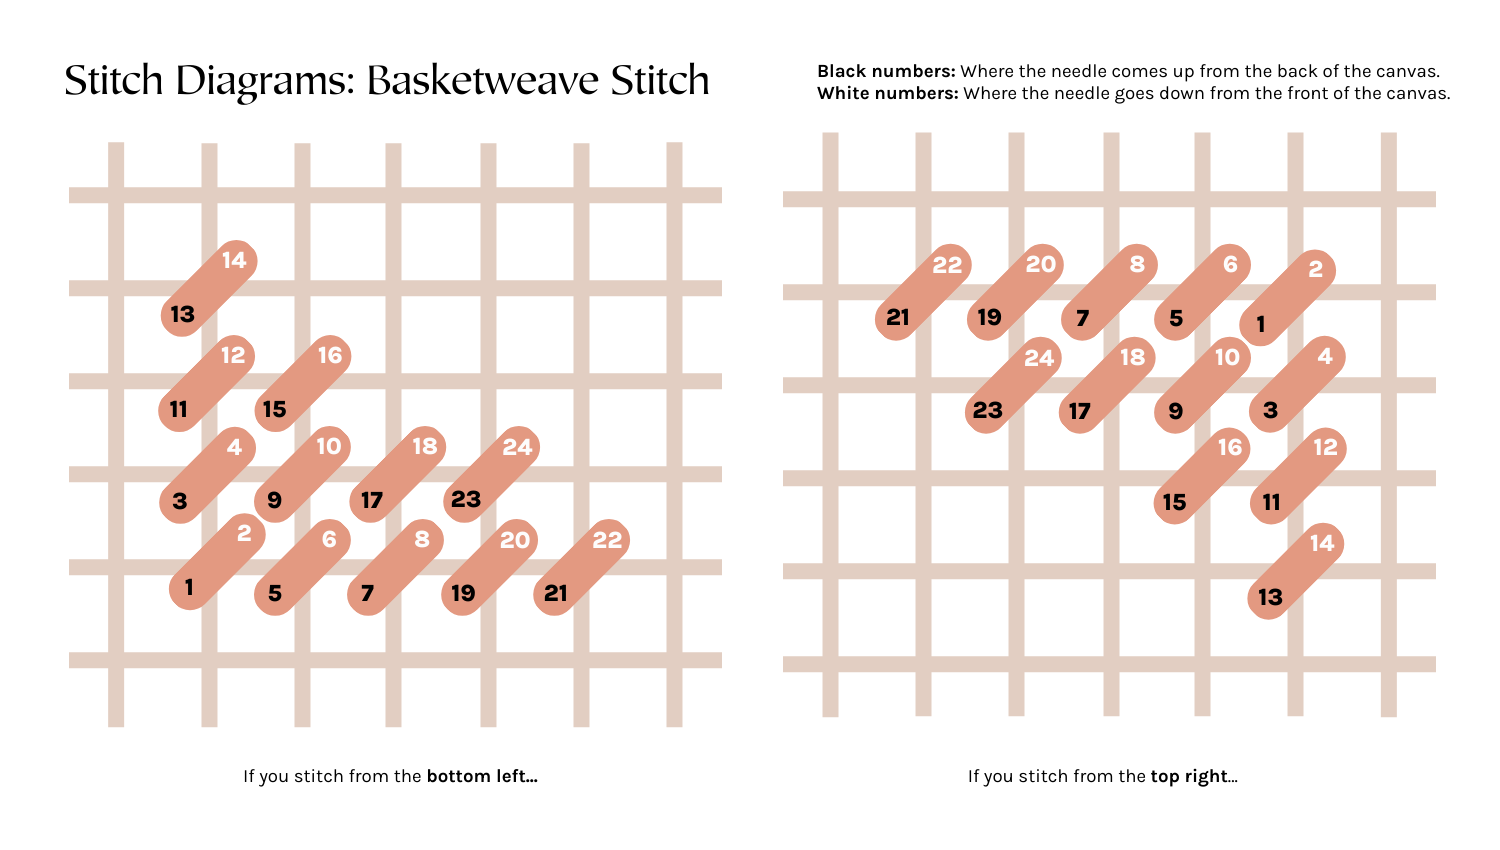
The Basketweave stitch is the best choice for preventing canvas distortion and creating a durable fabric. This stitch is worked in diagonal rows, alternating between upward rows and downward rows. The front of the stitch appears identical to the Continental, but the back forms a woven or "basket" pattern, which keeps the canvas square.
You will stitch in diagonal rows, alternating direction. For a row moving diagonally up and to the right, your stitches will be placed vertically (up the steps). For a row moving diagonally down and to the right, your stitches will be placed horizontally (down the steps). This alternating pattern creates the strong, woven backing and ensures your canvas remains straight.

 Sometimes you want to stitch Basketweave on a funky shape or a line. If you're a beginner, it may be confusing because you're thinking, "where is that little corner shape that I need to start with"?? The answer is: you don't need a corner.
You're just going to perform the same motion but starting with a longer first row! Then, when you've finished with the first row, you're going move forward to the next diagonal row and stitch the same way, but heading back toward your very first stitch. And on and on.
You just keep stitching back and forth along the diagonal rows until your stitching area is complete :)

This is a diagram about how I stitch Basketweave. I am right-handed, and I turn my canvas around a lot to find the most comfortable position for my hand. I also stitch on mostly Interlock canvases, which are more forgiving about the steps and poles of it all.
So, if nothing else makes sense, this may work for you. Even though this is untraditional — this stitch diagram makes sense to me, and gives me a perfect basket pattern on the back.
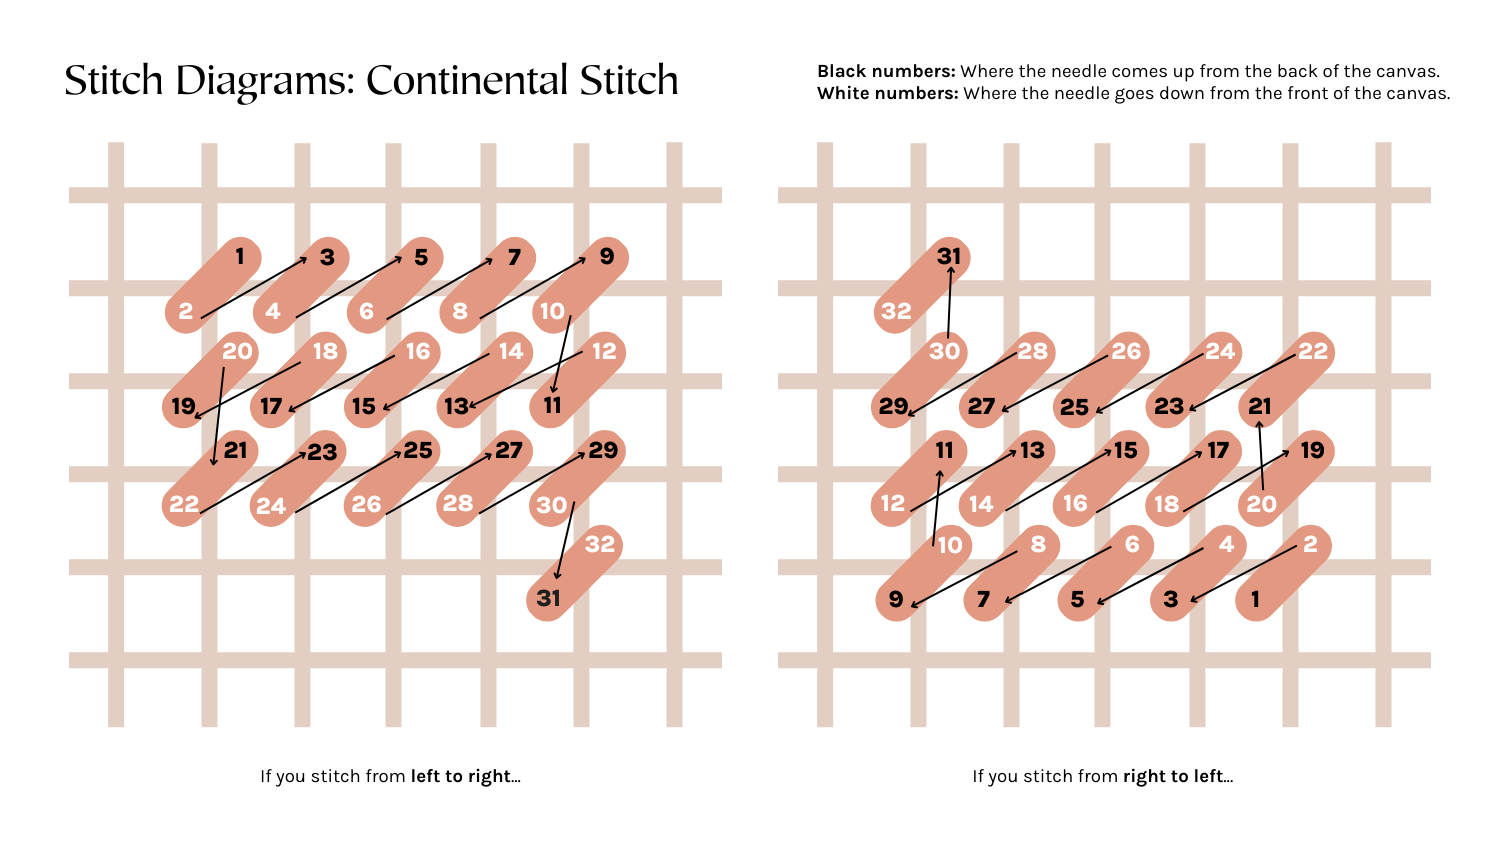
The most important thing about Basketweave is to remember that your "lines" (or rows) of stitching are going on the diagonals, rather than the horizontal or vertical lines of Half-Cross or Continental.
How I think about stitching is that each of my stitches go "back" so wherever the needle pokes up from the back of the canvas, I'm bringing the thread diagonally backward. I move up and down along the diagonals, always stitching "back" towards me.
More Tips for Perfect Basketweave
Stitching in the right direction is critical!
When you finish off a thread, the new piece of thread needs to start in the same position of the previous one. So, if you finish a thread in a row going downward, the next thread needs to start at the same spot and also be going downward. If you accidentally stitch two lines in the same direction, you will see that a small indentation will be formed in the front of the canvas.
How I remember which direction to stitch: I always stop stitching in the middle of a row, or at least 2-3 stitches short of the end of a row. That way I know where to fill in. Some friends of mine, leave the last piece of thread unsecured and coming up from the front of the canvas to signify where to pick you your stitching.
Secure thread tails properly to avoid ridges in your work.
To prevent diagonal ridges and raised textures on the front of the canvas, when you start or end a thread, you must run secure it horizontally or vertically. Do not secure a thread tail by running it through stitches on a diagonal.
One Extra How To Video :)
Just in case the first how-to video didn't make sense to you, here is another look at Basketweave. In this one, I'm actually stitching on a printed canvas.
The first 5 minutes are a slow tutorial on the “Basketweave” stitch. The second 5 minutes show how I actually sew without picking up the needle every time, sometimes called "needle weaving," I think it's a lot faster, more enjoyable, and creates perfect tension!


